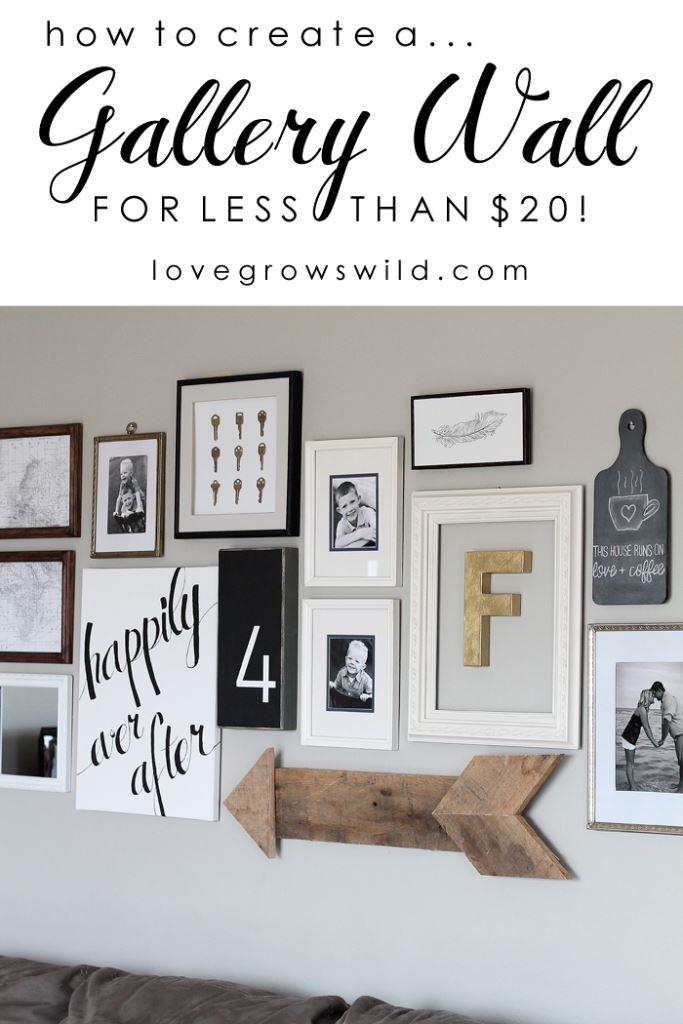
Have you ever stopped and looked at an empty wall in you home and thought to yourself, "what am I going to do with this wall?". I have had many moments like this and that's why I am super excited to be sharing with you how to create a gallery wall and the best part is that it will only set you back $20! You heard me right... only $20 for something you will be getting endless compliments on and will add warmth and happiness to your home.
When I can across this post on Love Grows Wild I immediately started planning my own wall, and I am almost finished with it! Here are some great steps to help you create your own Gallery Wall:
STEP 1: SHOP, THRIFT, RE-USE, AND UPCYCLE!
My first task was to shop around at thrift stores for old frames. I hit up Goodwill and scored probably 6 or 7 good size frames for around $20. I made sure to pick a variety of sizes and materials, such as metal and wood, that I knew I would create interest on the wall. When you’re looking for frames, don’t forget that you can easily spray paint them to whatever color you desire!
I brought everything home and laid them out on the floor, adding a few pieces I already owned… a blank canvas, my framed key specimen art, a small chalkboard, and a few small signs that needed a makeover. This was a great chance to clean out my closet and use up some of the items that I’ve had sitting around for awhile! I measured the wall above my couch and arranged the frames on the floor to those dimensions. Then I grabbed a piece of notebook paper and sketched out what I wanted to do with each frame. I sprayed a lot of them white to keep the wall light and spread a mixture of black, gold metal, and wood tones throughout the remaining pieces.
STEP 2: HANG IT UP!
(Are you ready for my awesome hanging trick? Seriously, write this one down!)
Once I was ready to hang everything on the wall, I used this simple trick:
1) First, I traced each frame on paper and cut the shape out. Any scrap paper will do… newspaper, brown paper bags, or even wax paper. I had a roll of white drawing paper, so I went with that.
2) Then I placed the paper on the back of the frame and made a hole where the nail should go.
3) Then came the fun part… arranging everything on the wall! The easiest way I’ve found to do this was to first mark off the area where you want your frames to go. My frames took up about a 7′ x 3′ space, so I found the center of the wall and how far above my couch I wanted the frames to start and used masking tape to create a 7′ x 3′ box on the wall. I didn’t have any exact measurements on the spacing of each frame, so I just eyeballed where I wanted each paper to go. I started with a paper from the center and worked my way out from there.
4) Once I had all the papers in place, we drilled through the hole in each paper to add an anchor and screw in the wall. Our house is on the older side, and these walls are TOUGH to drill through. Simple nails either bend or just tear up the wall, so my husband used a masonry bit and wall anchors to make sure everything stays where it’s supposed to. Even though our walls are a pain to drill through, it was SUPER easy to find each screw placement because of the handy templates I made! No guess work, and no 1,000 holes in the wall!
I tore all the tape and paper down and hung my frames on the wall.
THE COST:
So I told you this gallery wall cost under $20, right? Well here’s a little breakdown on how I kept such a tiny budget to cover a ton of wall space: I mentioned earlier that I spent about $20 in frames at the thrift store. I didn’t end up using all of them so a few will be re-purposed for another project. I already had the big white canvas from a two-pack I bought awhile ago. The small chalkboard I already had from a kitchen project, and I painted over a few small signs that didn’t fit my style anymore. And the wood arrow was made from a pallet. I had plenty of spray paint, stain, markers, and those sort of supplies on hand, so the only other thing I purchased for this wall was a paper mache letter F. That’s it! A little spray paint and some thrifted frames can go a LONG way, my friends!
To check out all the pics and more head over to Love Grows Wild!